Project set up
- In Blackboard, see Course Content > Final Project folder > Final
Project, V1(,V2,V3)
- Click on the group name link to see your group's members.
- if you don't see anything, you are not in a group.
- contact the members your Bb group and set up Teams ASAP.
- organize your MS Teams private channel -- see details
below
- by 3 calendar days after the Project Management class,
- All MS team members have met and participated in setting the
Project Plan.
- 4 calendar days after the Project Management class,
- anyone not communicating, participating, or
collaborating with their Bb group / MS team by this date will be removed
from the Bb group upon request by the other members, and will be
responsible for completing the project on their own.
- Similarly, any team not reporting a member's
non-participation by this date will be responsible for that person's
work.
Final Project Summary
Version 1 of the Final Project must be submitted to pass the course.
Your team will complete a coding project in the latter stages of the SDLC.
See Final Project Overview.docx
for more details. In Blackboard (Bb), a team is called a "group".
There are many details involved in the final project. Without good project
management, academic group work can be a nightmare.
Set up personal development tools for the project:
- you can use any compiler you want. Prof. Andrei's video tutorials
demonstrate with gcc installed for the sake of simplicity.
- optional command line C compilers:
- Windows users can use Microsoft's cl compiler
- Mac users with Xcode or Visual Studio Code already have gcc
- How To Install git (Version Control)
https://youtu.be/tudlTazZh28, then
git basics.docx -- for both Windows and macOS
MS Office 365 Teams
MS Teams has become an industry standard collaboration environment to develop
projects. Because students are not authorized to create their own MS Team, the
team leader should follow these steps to create a "private channel" within your
class Team.
Sign on to mySeneca.ca,
- from the MS Office 365 grid menu, start the Teams app. Consider
installing the local client version of Teams for better performance and ease
of use.
- click on the Teams icon in the left sidebar.
Within the class team, a Private Channel will be the repository for your
team's assignment artifacts (project files).
To create a private channel, start MS Teams.
- On the left, click Teams icon.
In the next column, find your class's
CPR101XYY team, click ••• beside the team name,
click Add channel in the drop down menu.
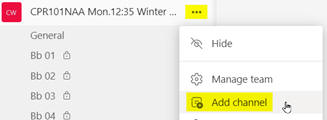
- Channel set up
- Channel name: "Bb nn" and your two digit Blackboard group
number. e.g. "Bb 01" (note the space after Bb and the leading
zero)
- Under Privacy, change from Standard to Private - Accessible only to
members of the team.
- Please do this carefully because Teams does not give us the
authorization to modify this setting afterwards.
- If the Private setting was missed (you don't see the lock
symbol),
- Edit the channel and rename the team to Bb 0n Standard,
- delete that channel,
- recreate with original Bb0n number as Private.
- Select Next.
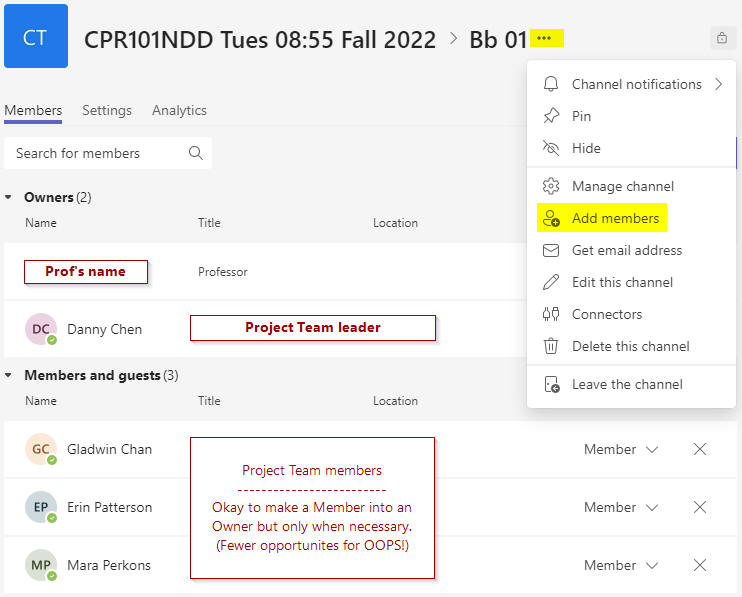
- Type in the name or Seneca user ID of each team member.
- People must already be members of the class Team. If not, contact
your professor.
- Add your professor as an Owner
- Select Add.
the result:
- Post a message in Bb 0# channel's "Posts". Type "@Bb
[Enter]" which will alert all channel members.
Post to the attention of one or more individuals using @member_name.
People you've added will see it appear in their channel list with a lock next
to the name; the lock indicates a private channel. To see everyone who has been
added to the private channel, select the Open people pane or click the ( i ) at
top right.. MS Support:
Create and use a private channel